Step 1
Let’s get started! Use a flat eyeshadow brush to apply the shadow with precision and pack on pigment for intensity – here we used the Precision Double Ended Eyeshadow Brush. Apply OnColour Mono Eyeshadow in Silver Grey over the center of your eyelid and pat it on little by little.
Step 2
Then, simply flip the brush and use the sponge applicator to apply OnColour Mono Eyeshadow in shade Dazzle Beige. I use it to place the lighter eyeshadow in the corner of your eyes. This helps to keep your eyes looking awake even when using darker eyeshadow shades for the rest of the look.

Step 3
Now it’s time for some drama! This might seem tricky, but rest assured, it is easy. Apply OnColour Mono Eyeshadow Velvet Black to the outer corner of your eye in a V-shape like an arrow pointing outwards. Continue to pat - slowly building up the pigment. Now with a clean Precision Blending Brush, lightly sweep your brow bone using half circle motions to blend away any harsh edges.
Step 4
Take the same silver eyeshadow and brush it along your bottom lash line.
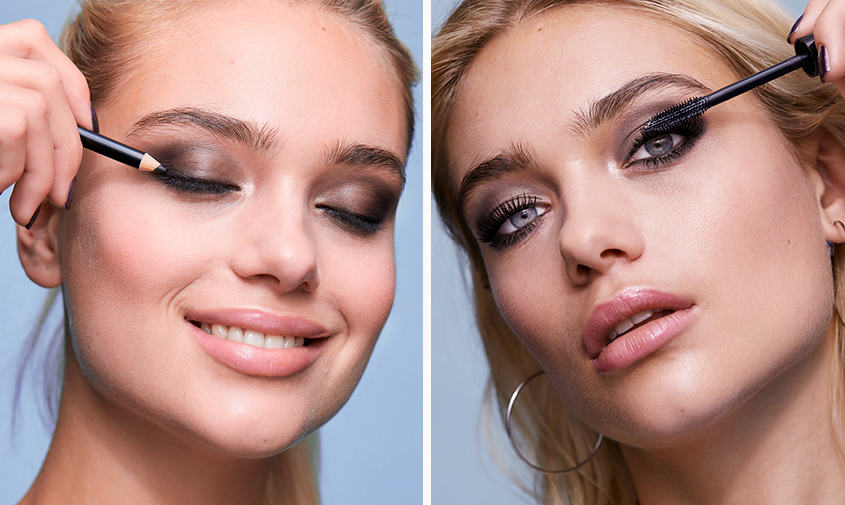
Step 5
To bring it all together take OnColour Perfect Duo Eye Pencil in Black & White and use the black colour to apply on your upper lash line. Pair this look with a volume enhancing mascara - OnColour Big Lash Mascara which gives your lashes intense volume!
Step 6
For the final touches, use a concealer under the eyes to brighten and conceal any dark colouration. We applied the OnColour Blusher in Cool Pink on the apples of the cheeks for some warmth and puckered up with theese beautiful nude lips. The smokey eye really pops when paired with a nude pout!
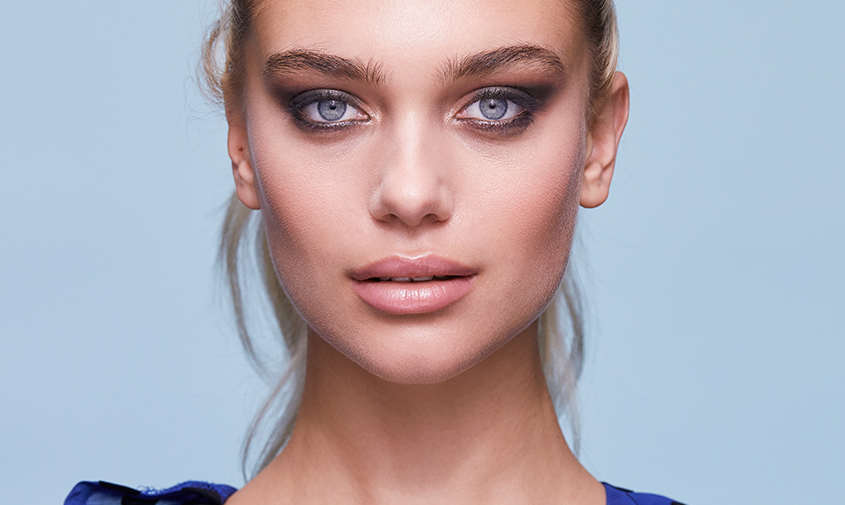
That’s it my friends – simple, chic and intense! Can’t wait to see your smokey eye looks - tag us in social media with #getOnColour so we can see your smokey eyes!

