If you sit in front of a computer for more hours than you’d like on a daily basis (don’t we all!), you’re not alone. But we’re here to snap you out of a sedentary start to your day! Not only is sitting all day terrible for your body but it can lead to a host of health problems.
Here, certified yoga instructor and Oriflame Global Senior Communication Manger, Veronica Ek, walks us through a morning yoga routine that anyone – beginner or advanced level – can incorporate into their day. It’s especially designed for combating stiffness from sitting in front of a computer, with poses that loosen up your spine and neck. Your body and mind will thank you – trust us!

2: Cat-cow
This very basic – but incredibly beneficial! - yoga pose is a perfect way to start any morning routine. “Cat-cow is a great way to loosen up your spine and neck, but also to get in sync with your breathing and relieve stress,” says Ek.
How To Do It: Begin on your hands and knees in table pose, with a neutral spine. As you inhale and move into cow pose, lift your hips and bum upward, press your chest forward and allow your belly to sink. Lift your head, relax your shoulders away from your ears, and gaze straight ahead. As you exhale, come into cat pose by rounding your spine outward, tucking in your tailbone, and drawing your pubic bone forward. Release your head toward the floor - just don’t force your chin to your chest. Most importantly, just relax.
Veronica’s Tips:
• Use cat-cow as a warm up, especially before going into the sun salutation (next up!).
Sun Salutation
This classic yoga sequence is much-loved by yogis as it warms up the whole body in one flow. ”This is a great way to get the circulation going and to stretch out the muscles that would be stiff after sitting down for long periods of time, like hamstrings and shoulders,” says Ek. The sun salutation demonstrated here is a series of seven poses.
How To Do It:
1. Upward Salute
Start with distributing your weight evenly over both feet. Find a calm, steady rhythm for your breath. Next, inhale deeply and stretch your arms out over your head, bringing your palms together. Drop your head back and gaze up at your thumbs, then let your arms fall to your sides.
2. Standing Forward Bend
Exhaling, slowly fold over from the hip, bending your knees if you feel pressure on your lower back. Release your neck so that your head hangs heavily from your upper spine.
3. Lunge
Lunge back with your left foot, centering your left knee over the heel so that your shin is perpendicular to the floor, and bring your left thigh parallel to the floor. Lengthen the torso while looking forward.
4. Plank
Inhale and bring your torso forward until your shoulders are over your wrists and the arms are perpendicular to the floor (you may need to walk your hands forward a bit so your torso is parallel to the floor). Try not to let your upper back collapse between the shoulder blades: press your outer arms inward, and then - against this resistance - spread your shoulder blades apart. Firm your tailbone against your pelvis and press your thighs up.
5. Cobra
Exhale as you bend your elbows and lower down, pressing your pelvis into the floor Keep your shoulders down, away from your ears and look down at the floor or slightly forward. If you can’t maintain your alignment, place your knees on the floor until you have built more strength.
6. Downward-Facing Dog
Exhale and step your right foot back to meet your left. Press your hips into the air as you press your palms firmly against the floor. Imagine that your torso is being stretched like a rubber band between the arms and legs.
7. To finish, step the right foot forward into a lunge, then inhale into the forward bend.
Inhale into the upward salute and end the sequence with one last exhale and your arms at your sides.
Veronica’s Tips:
• When you lower from plank pose to cobra, keep stomach strong and elbows close to your body.
• In cobra, make sure to roll back your shoulders and keep them there. Only lift as far as you can with your shoulders lowered.
• In downward-facing dog, spread your fingers wide and push your hips as far as you can from your hands. Shoulders away from ears. Only when you’ve achieved that you can start trying to straighten out your legs and lower feet to the floor.

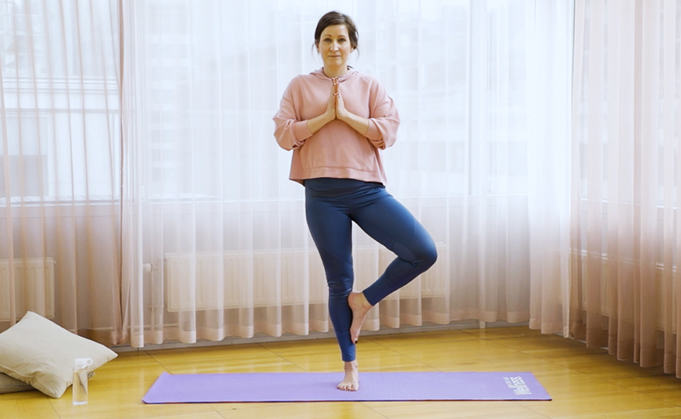
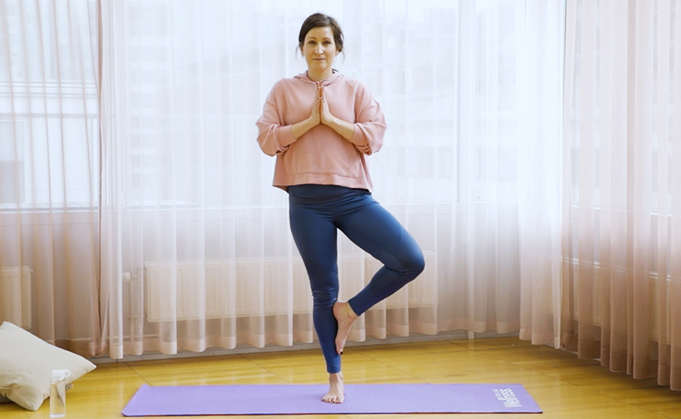
Tree Pose
Tree pose is a great way for beginners to start or end any routine as it is really all about concentration, balance, and focus.
How To Do It: Start by standing straight with a long, tall back and your feet aligned and touching, distributing your weight evenly over both feet. Arms at your sides. Take a few breaths and find a place or object in the room to focus your attention. Slowly shift your weight to your left leg and begin to raise your right foot off the floor. Softly press the sole of your right foot against the inside of your left thigh. The toes should be pointing down and your pelvis should be completely straight. Put your hands together in front of your heart.
Veronica’s Tips:
• Make sure to put your foot either on your calf or your thigh - do not put your foot on your knee as that could potentially damage your knee.

Seated spinal twist
While there are many causes of lower back pain, spending extended periods in positions of poor posture can cause tightness and pain in the lower back – and seated spinal twists can release some of this tension. “Twists in general are good for circulation and release tension, mainly in the lower back,” says Ek.
How To Do It: Sit upright with your legs crossed in front of you. Reach your left arm up and inhale (keep your right hand at your side). Exhale and put your left arm on your right knee. Inhale and lengthen your spine. Exhale and twist. Repeat on the opposite side.
Veronica’s Tips:
• Make sure you elongate your spine on inhale and deepen twist on exhale. The twist should be evenly distributed along the entire spine and not only focused on twisting in the lower back. Both cheeks on the floor throughout the movement!

Bridge Pose
When working in front of a computer all day you tend to round shoulders as you lean forward. Bridge pose stretches the chest, shoulders and hips, which will release some much-needed tension from your upper body.
How To Do It: Lie on your back with your knees bent and feet on the floor. Extend your arms along the floor, palms flat. Press your feet and arms firmly into the floor. Exhale as you lift your hips toward the ceiling. Draw your tailbone toward your pubic bone, holding your buttocks off the floor. Do not squeeze your glutes or flex your buttocks. Roll your shoulders back and underneath your body. Straighten your arms as much as possible, pressing your forearms into the mat. Reach your knuckles toward your heels.
Keep your thighs and feet parallel — do not roll to the outer edges of your feet or let your knees drop together. Press your weight evenly across all four corners of both feet. Lengthen your tailbone toward the backs of your knees.
Veronica’s Tips:
• Feet and knees should be hip-width apart. Lift your hips up high. When coming down lift up your heels and roll down your back to the floor.
Repeat the whole sequence as many times as feels good. Thank yourself and your body for this renewed energy, and walk away feeling centered, focused and ready for the day. Namaste!


